Let us discover the installation of the parent APP in your android mobile and tablet, open the Play store and search for SIPSNITYA, click on the install button, it may take a little time, once the installation is over click on open, it will prompt for permissions, please allow the same. now the APP will open please enter your registered mobile number here, if the registered number is configured properly at school it will take you to the next step. some times unfortunately registered mobile number may give an error like – the number is not available in our database etc. don’t worry about the same if you are doubtful you can try with another mobile number, else please scroll down here you can get connected with our support team over a Whatsapp chat, click on help over WhatsApp button, it will open the WhatsApp in your phone and prompt for your query, please provide maximum possible information like Student name, class or section and school name, etc. Our support team will assist you to get this problem resolved.
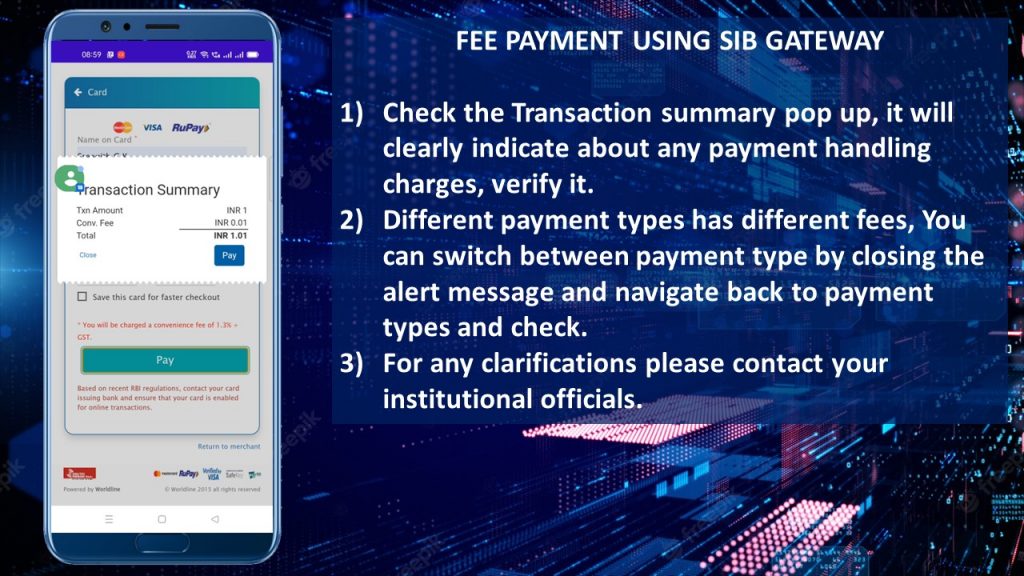
If your mobile number is registered with us then, it will accept and take you to the GET IN screen, here you have to provide the mobile number again, if you are first time user then it will ask you to create a PIN, create a PIN of your choice, you will also receive an OTP please provide the received OTP, User activation has happened and it will take you to the login screen where you can give mobile and PIN to activate your device, future logins won’t ask this if the APP is frequently used. please contact our support channel or the institutional officials for any assistance. Now let us discover how to make fees payment using south Indian bank’s gateway. Scroll down and click on the Fees details button, student details and fees details will be available in detail here, verify it and click on the Pay button, You get an option to change the payment amount, by default it will automatically be populated with the pending amount if change permitted then you can edit it. The next screen will provide you with the payment preview. please click on the CHECKOUT button. choose the desired payment method. here we are using a credit card for the demonstration purpose. Once you enter the card number and related information and proceed you get another popup with details of payment handling charges, these are additional charges on top of your fee amount, it depends upon the type of payment you select if you are not happy with the charges you can go back and change the payment type. for this just click on the close option of the pop-up message and navigate back and select another payment instrument. when you are clear please click on the PAY button it will take you to the respective bank authorization page, you have to authorize the transaction with the OTP. Once the authorization is over you will get back to the application again where you can see the transaction status. if the APP is enabled with multi-login, which means PARENT and TEACHER, etc. again login to the parent app, it will take you to the transaction details automatically. When you navigate again to the fees details you can see the status as processing, It may take a couple of days for the verification at the institutional end. You will be notified immediately on verification over an SMS, or APP notification, etc., You will also provide with a message receipt, you can log in back to the application again and see the received messages for the confirmation, now if we go to fees details you can see the receipt is generated and processing button changed to receipt button. when you click on the receipt button you can see the preview of the receipt. scroll down here you have the option to download the receipt. You can download the receipt as PDF. This receipt will be available here, you can download at any time when you required. Thank you for watching this video tutorial, Kindly subscribe to our channel for more updates.